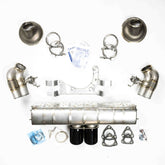
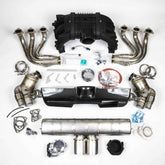
991 GT3/RS Street Header Installation Guide
Step-by-step guide on installing catted headers to your GT3. Also contains a 991.3 and Speedster addendum.


CAUTION:
- Allow exhaust to cool entirely before starting install.
- Always ensure that the vehicle is properly supported on jack stands on a stable and level surface.
- Dundon Motorsports is not responsible for any personal injury or damage(s) caused to a vehicle during the Installation of our products.
Tools Required:
- T 25 TORX SOCKET
- 10MM SOCKET
- 12MM SOCKET
- 13MM SOCKET
- 11MM DEEP SOCKET
- 12MM SWIVEL SOCKET
- 22MM OPEN END WRENCH (FOR 02 SENSORS)
- 13MM OPEN END WRENCH
- 3/8 SWIVEL
- 3/8 EXTENSION 6IN AND 12IN
- ¼ DRIVE RATCHET
- 3/8 DRIVE RATCHET
- TORQUE WRENCH
Tightening Torque
- V-band clamps 15nm
- Header to head nuts 30nm
Please re-check the torque on the V-band clamps after 200 miles
Approximate Installation Time for This Job is 3-4 Hours
Start by removing the bumper cover, bumper, tail lights, heat shields, and factory exhaust while leaving the center muffler loosely installed. Remove all of this according to manufacturer's instructions.
Loosely bolt headers in place on both sides.

Insert flapped side muffler deletes into center muffler and leave loose.

Installing the Cat Sections
Install the cat sections using V-band clamps to loosely hold them in place.

*Note the positioning of the V-band clamps. Position this way for clearance and ease of access.


Attach supplied brackets to factory side muffler mount. Brackets are pre-installed with hardware on the Cats when they come out of the box.

Once all components are installed you can start tightening them down.
- Tighten the header to the head
- V-band clamps
- Center Muffler flanges
- Center muffler straps
- Bracket bolts
Reinstall the O2 sensors taking care that they are installed as they are shown in the picture.

Reconnect vacuum lines to the valves using supplied vacuum line.

Before reinstalling bumper and trim start vehicle and check all exhaust connections for leaks.

991.3 and Speedster Instructions Addendum
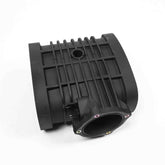
Springs on valve assembly must be installed as shown for correct orientation and location to actuators.
Before Starting the Car!!
An exhaust valve adaption must be performed, otherwise there will be faults. Check engine light and reduced power mode will be present. Failure to follow the below instructions will result in a fault.
Piwis 3
-DME
-Drive links, perform activation of exhaust valves for 5-10 seconds. This will allow the DME to move the valves to the full range open and close and will learn the max stopping positions.
-Adaptions: Perform valve adaption. This can only be done once the drive links have been activated previously. If this DOES NOT set, then perform drive link activation again for a longer period, about 3-5 activations per side minimum.
Once completed, check and clear faults.


