


992 GT3/RS Cat-Back Exhaust Install Instructions
1. Open Coolant and Oil fill hatch on rear of car. Make sure car is cool. Remove the oil fill cap and remove plastic trim piece that surrounds the caps by pulling in the upward direction.


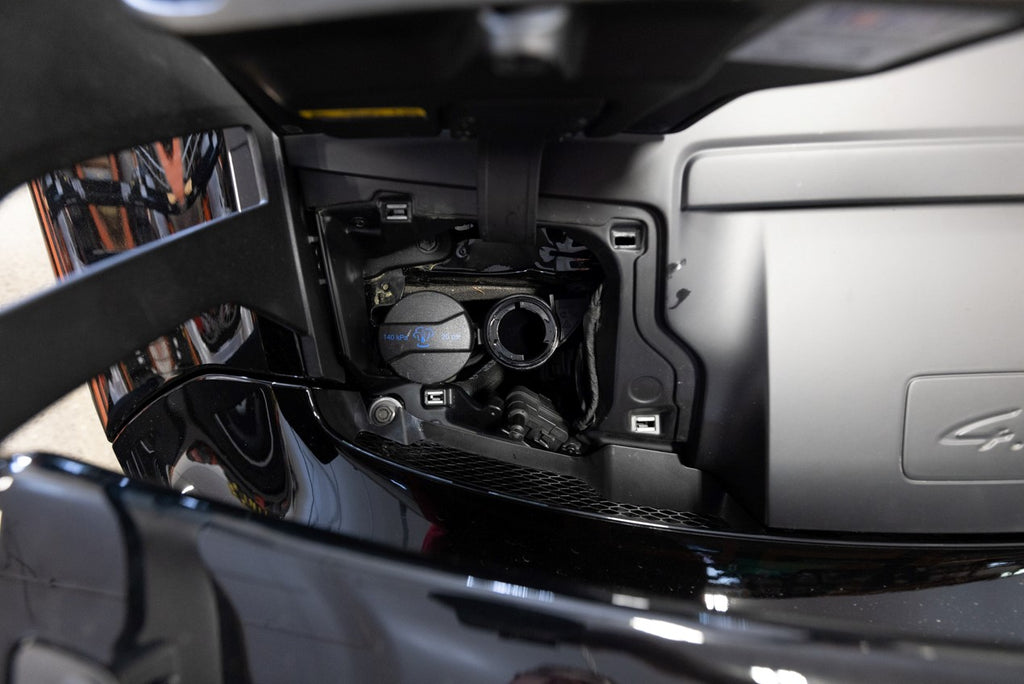
2. Repeat for passenger side cover and remove plastic trim on this side as well. The exterior trim piece comes off by pulling upward on the rear side of the car. Pull upward here with your hand. There will be a similar underside plastic trim to pull upward on and remove as well. The 2nd picture below has both plastic pieces removed.


4. Remove 2 13mm bolts that hold the lower wing piece on, after the bolts are removed, the whole lower wing slides toward the rear of the car and comes off completely.

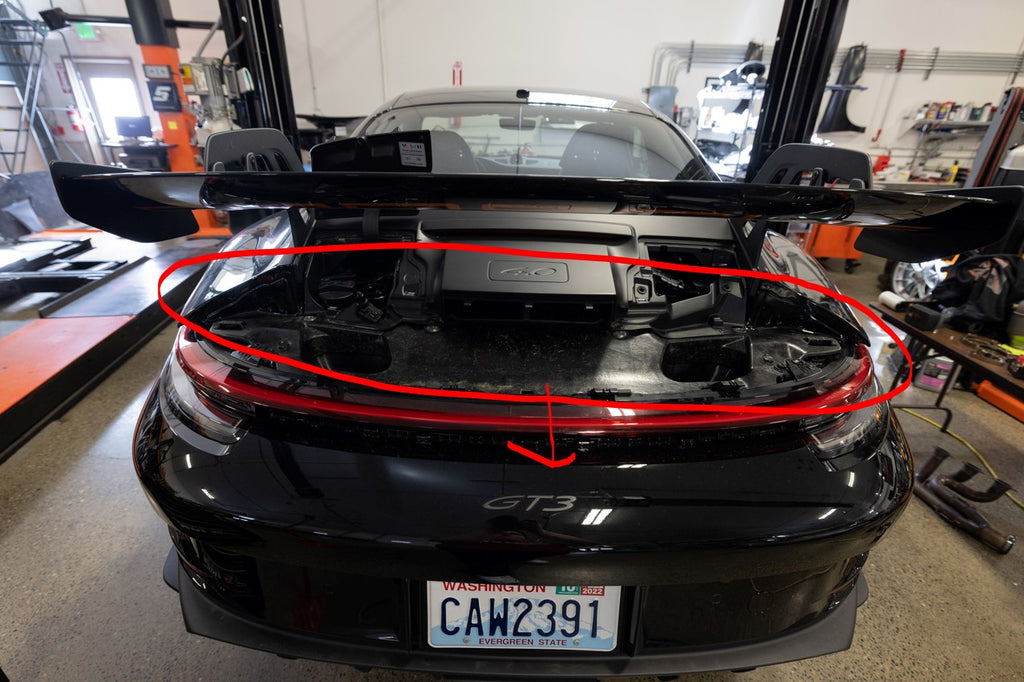
5. Remove the upper tail light next. This is held on by 6 Torx T30 bolts and some of the bolts have brackets with them as well for the upper wing, set these aside and keep together when removed.

6. Carefully slide the tail light toward rear of car. There is a connector on each side that needs to be unplugged as well, so the light will need to be partially slid out to get to the connectors. The 992 connectors have a red tab that needs to be slid away from the connector then pushed like a button to unclasp the connector.


6. The lower tail light can now be removed. There are 2 T30s holding this light in, the one on the right has a metal sleeve surrounding the bolt this piece is not captured and can be lost easily. Repeat for driver side.

7. Disconnect bumper plugs behind lower tail light, there is one on the driver side and 2 on the passenger side.


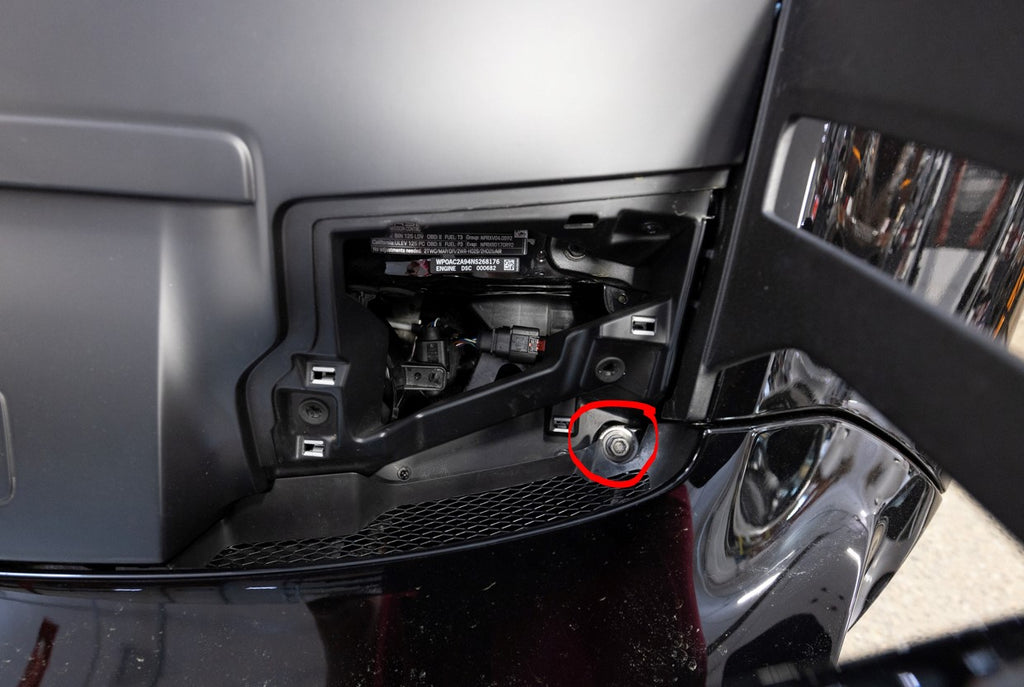
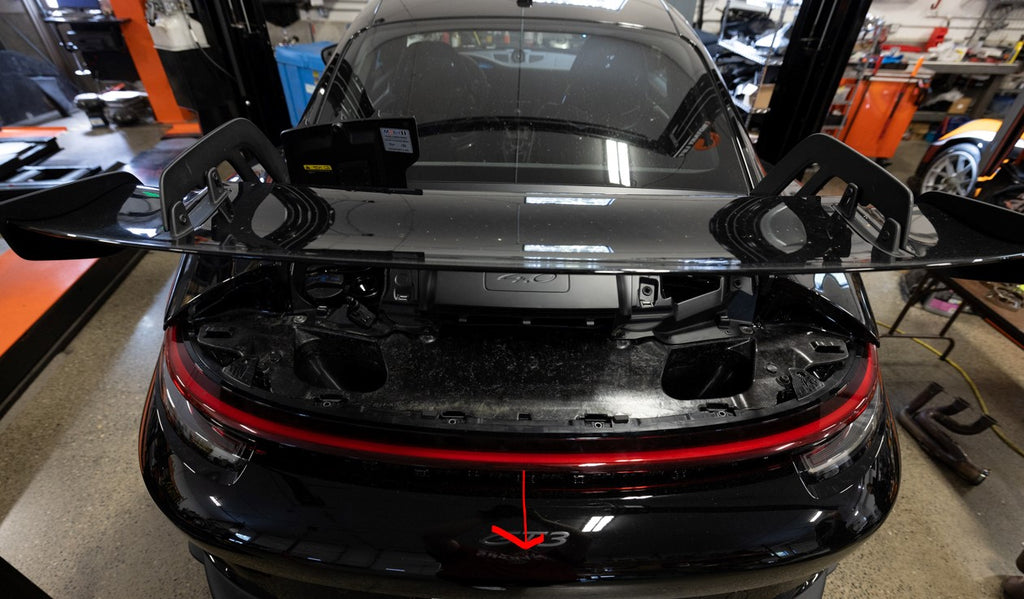
8. The rear wheels now need to be removed to help make the bumper removal easier. Once the wheels are removed, remove the rear inner fender liners (4 T25 Torx and 1 10mm plastic nut) and 1 10mm plastic nut that is holding the second fender liner onto the chassis. There is a bumper bolt (red arrow in 3rd picture) that is a lot easier to get to once removed. Repeat for other side.


9. Remove 3 T30 Torx screws that hold the bumper on behind wheel liner.


10. Remove lower diffuser (3 T30 Torx screws). Bolts 4 and 5 can be removed 50% of the way out way and the diffuser can be slid rearward to remove diffuser. Then remove all lower T30 screws for the bumper.


11. Remove final 2 bumper screws behind the tail lights with a helper and now the bumper can be completely removed. Pull out on the upper edge front (corner touching wheel well) of the bumper then push back toward the back of the car and the bumper will slide off the car. We recommend having two people perform this job.


12. Remove each diffuser bracket, by removing the bolts circled below they are e10 bolts.

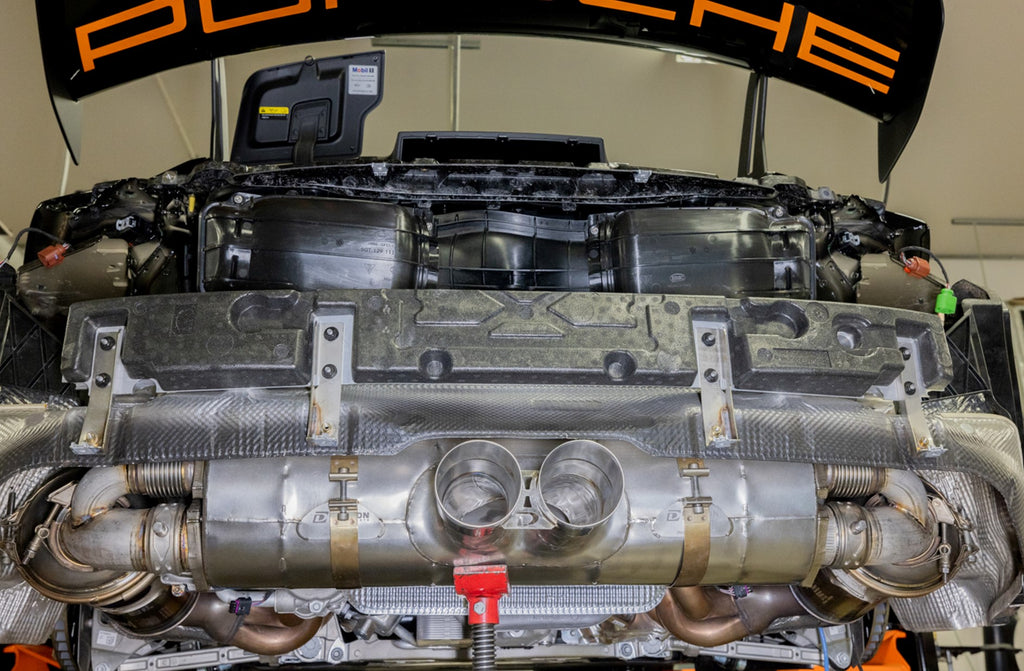
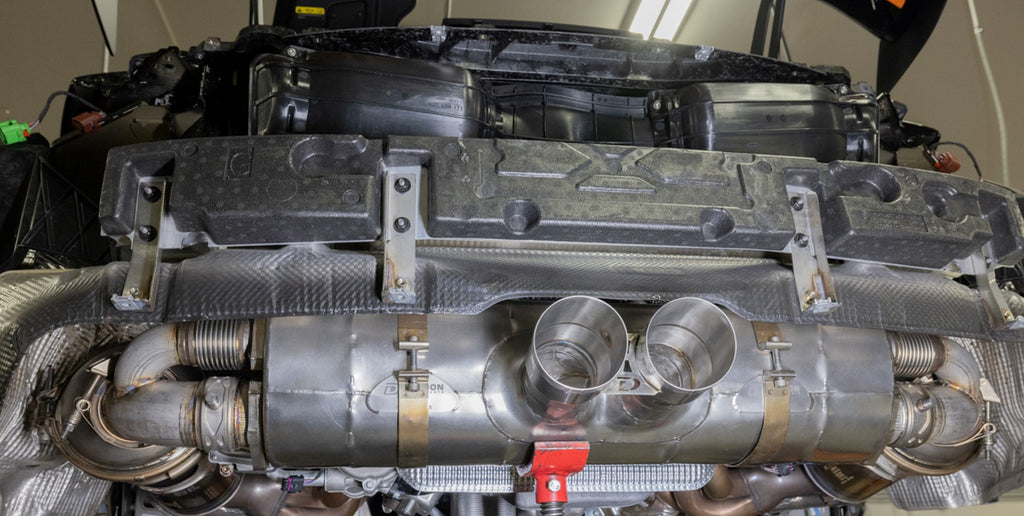
13. Place a screw jack underneath the muffler to support the muffler, This is also a place where a second person is convenient for an extra hand. Unscrew the M6 bolts for the muffler straps at least half way out so you can get the bolt out of the cradle, push the straps off of the muffler bracket to allow the muffler to come off of the car. Unplug both passenger and driver E-valve connectors that are plugged into the muffler.

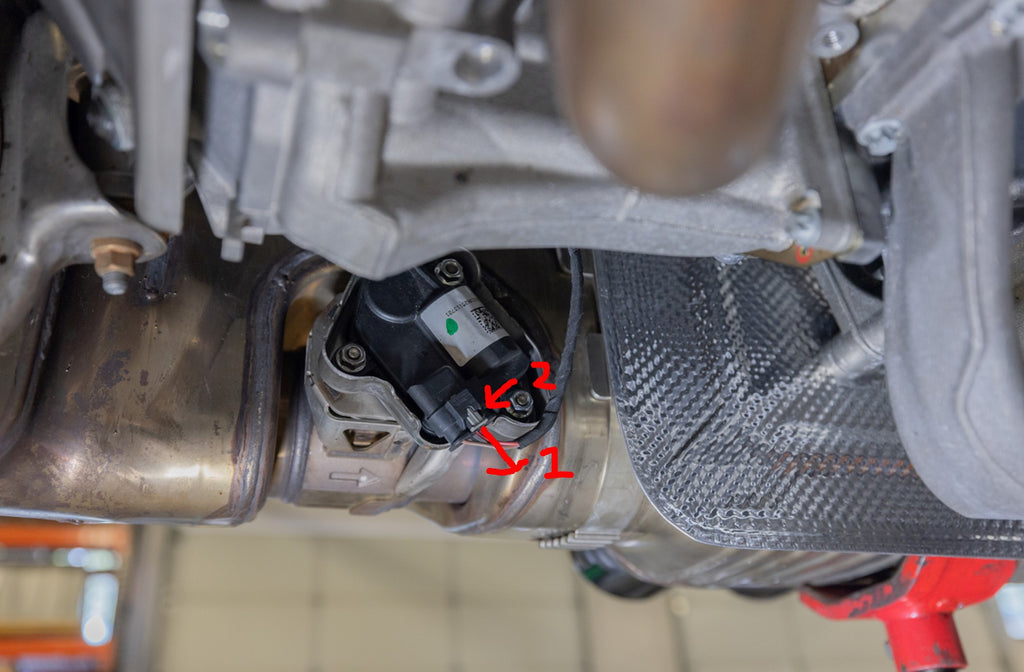
14. Remove the bolt that holds the muffler to each OPF bank 1 and 2. This is an M6 hex bolt. There is a nut on the backside that is loose so be careful not to lose this.

15. At this point the muffler is just being held by the screw jack, grab another person and remove the muffler from the car, this may take a bit of wiggling to get it loose from the OPF outlets. Careful to also get the clamps for the OPF outlets free as you are removing the muffler.

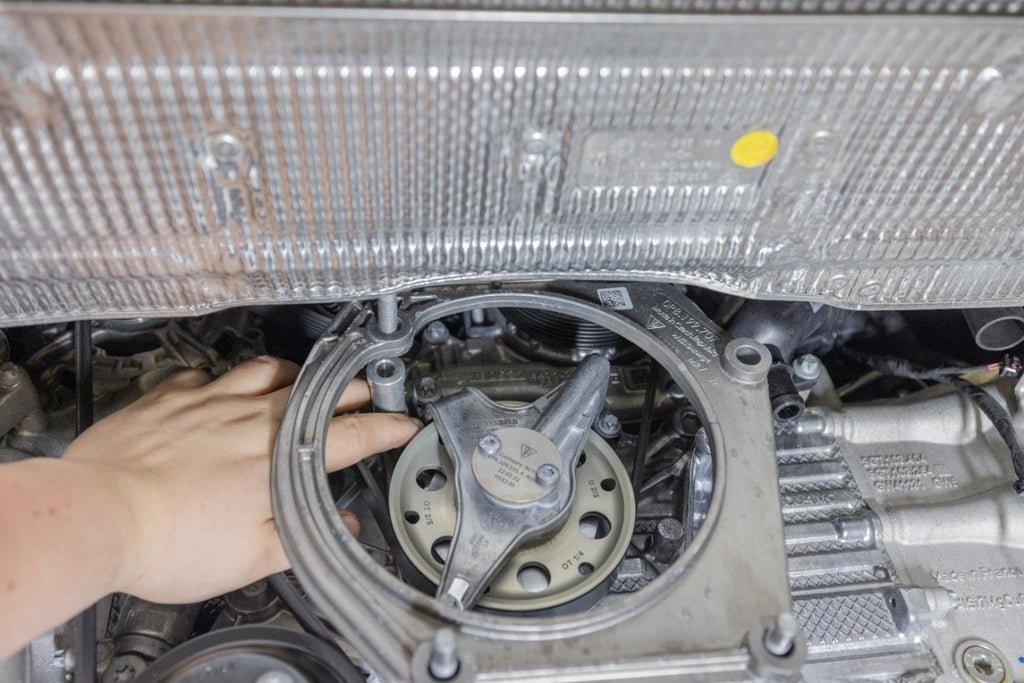
16. Remove the OEM muffler bracket. The upper bolt can be reached through the frame with a long extension and socket.

17. There is a spacer for the upper bolt, when removing the muffler brackets be careful not to lose this spacer.


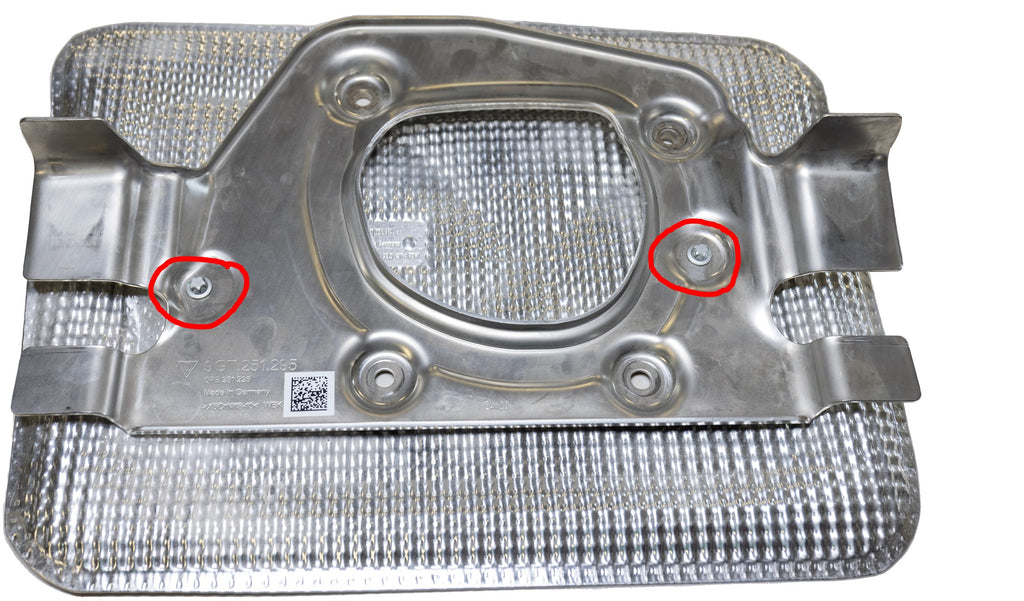
18. Remove the heatshield from the OEM muffler bracket and install on the new supplied muffler bracket. Washers for the heatshield go on the backside of the muffler bracket as shown below.


19. Install the new supplied muffler bracket with heatshield now installed onto the car. Put new supplied M10 washer on the upper left bolt when installing the bracket shown in the picture below. Remember the spacer also needs to be installed behind the engine brace. Torque to spec.

20. Remove the OEM muffler clamps from the muffler, you can use a pair of tin snips or shears to do this job easily. See the picture below, we need these to attach the OPF outlets to the OEM OPFs

21. Remove electronic actuators from the OEM muffler and put onto the new valve assemblies. There is a spring that needs to be installed into the valve and then the electronic actuator can be installed. If the spring in the valve assembly does not line up with electronic actuator, a screwdriver may be needed to assist in getting the part installed. The computer will be able to adjust later, however we do not want to try and rotate the electronic part.


The actuator below is not completely aligned, here is how we deal with this.


22. Now we can install each OPF outlet and hang the muffler from the muffler bracket in preparation for putting the valves in place. I recommend using a screw jack to hold the muffler so that you are able to leave it looser and have more play for install.


23. Install the valves, flanges, and donuts on the muffler loosely, ensuring there is a v-band gasket in each of the valve sections and all donuts are properly installed in the muffler.


24. Now you can adjust the muffler after this is all roughly assembled. The valves need to be pointed in a straight line into the muffler and the muffler needs to be slid side to side to ensure that it is located in the center of the car.
25. Plug in the electronic actuators for the valves. Nothing should be tightened down yet and should still be loosely installed. Follow the tightening procedure below:
- Tighten Bank 2 OPF clamp down 60% of the way, until the OPF outlet rotates but cannot be pulled off of the OPF.
- Tighten Bank 1 OPF clamp down 60% of the way, until the OPF outlet rotates but cannot be pulled off of the OPF.
- Tighten Bank 2 V-band clamp down 50% of the way.
- Tighten Bank 1 V-band clamp down 50% of the way.
- Tighten Bank 2 muffler flanges with donuts and torque all to 30 Nm.
- Tighten Bank 1 muffler flanges with donuts and torque all to 30 Nm.
- Tighten driver's side muffler strap so that muffler is well secured.
- Tighten passenger side muffler strap so that muffler is well secured.
- Go back and tighten down the OPF clamps, the V-band clamps and make sure these are now tightened completely.
26. Double check everything is tight and installed correctly then you can follow the instructions in reverse to re-assemble the car. Remember to install the diffuser brackets before you put the rear bumper on.
27. Diffuser Ducts Installation instructions

WHAT IS INCLUDED?

1. Remove diffuser from the car

2. Prepare Dundon 992 GT3/RS Diffuser Ducts for installation

3. Put 992 Diffuser Duct – Main Body (RIGHT) on the metal duct

4. Put 992 Diffuser Duct – Cap (RIGHT) on the metal duct
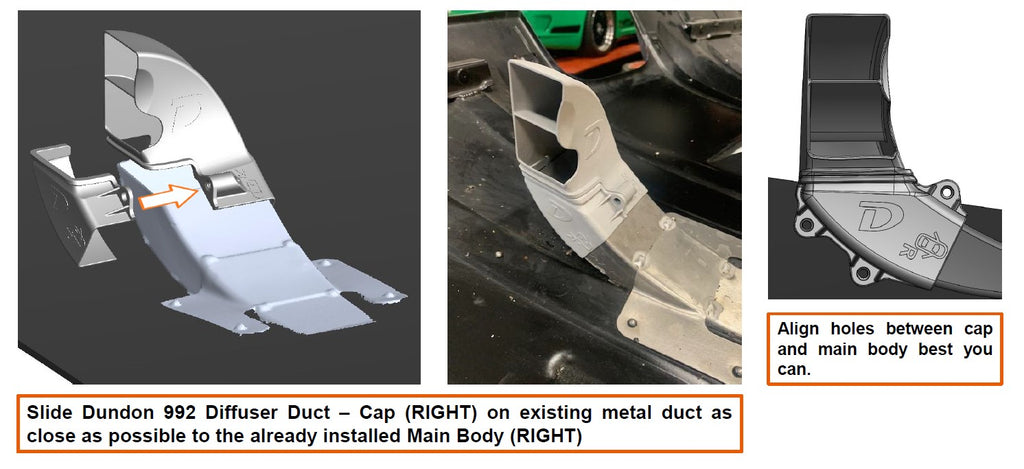
5. Put and fasten 3x M5 bolts

6. Put 992 Diffuser Duct – Main Body (LEFT) on the metal duct

7. Put 992 Diffuser Duct – Cap (LEFT) on the metal duct

8. Put and fasten 3x M5 bolts

9. Put diffuser back on the car

28. THE ELECTRONIC VALVES NEED TO BE CALIBRATED WITH A PIWIS BEFORE STARTING THE CAR!
29. Enjoy your new exhaust!!
30. It is normal for things to expand and contract after a few heat cycles. Ensure you check the torque of all fasteners after a spirited drive and a tank of gas has been consumed.